This site contains explicit illustrated media and adult AI creation tools. Continue only if you are 18 or older and viewing adult content is legal where you live.
By entering, you confirm that you are at least 18 years old and that viewing adult content is legal in your location.
Crypto payment guide
Pay with crypto, step by step
Never used crypto before? Follow this guide from opening an account to seeing your Yamete order complete. The official Coinbase and NOWPayments screens were captured on 29 August 2026; controls may change after that date.
Choose a regulated exchange or wallet service that is available in your country.
Have a phone, email, identity document, and a supported funding method ready if the service asks for them.
Enable two-factor authentication before adding money.
Keep the Yamete order ID until Credits or pass time appears in your account.
01
Prepare
Choose a crypto account available in your region
Use a regulated exchange or wallet service that lets you add local money, buy crypto, and send it to an external address. Availability, identity checks, funding methods, assets, networks, and fees depend on your country and provider.
Check that the service supports withdrawals, not only buying and selling.
Do not choose an asset yet; first see what the hosted invoice offers.
Yamete does not require or store your exchange login details.
02
Account
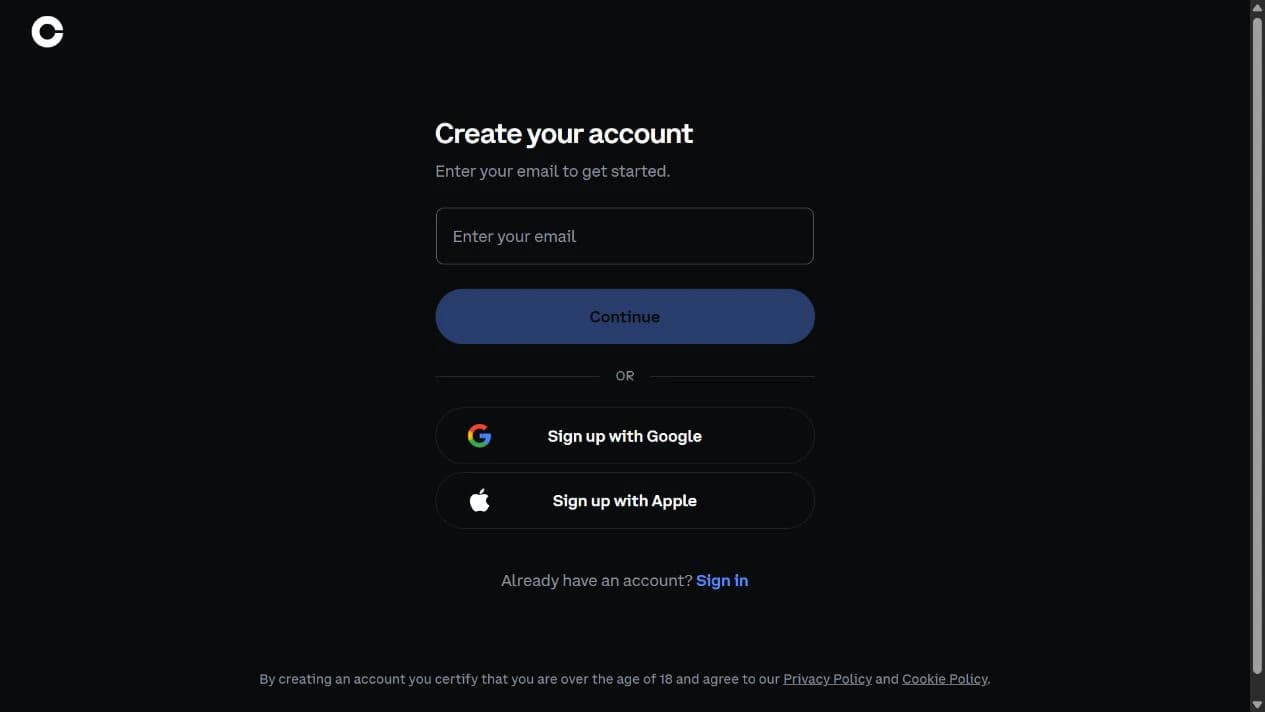
Register, verify, and enable 2FA
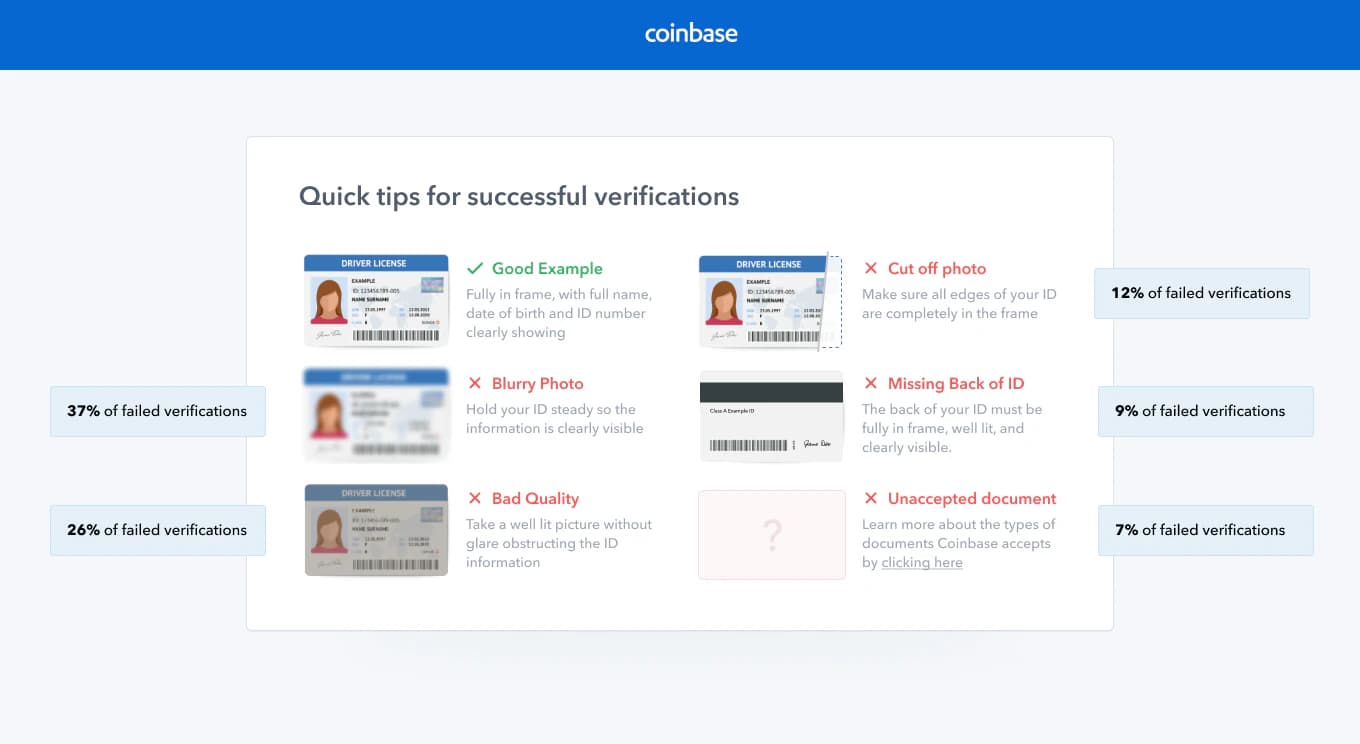
Create the account on the provider's official app or website. Confirm your email or phone, complete identity verification if required, and turn on two-factor authentication before funding the account.
Use only the provider's official domain or app listing.
Never share login codes with Yamete support.
Wait until withdrawals are enabled before starting checkout.
Account creation
12
Official interface screenshot — controls may changeCreate your account
1
Enter an email address you control on the official domain.
2
Continue only after checking the browser address and provider name.
Open the exchange's Add cash, Deposit, or Fund screen and choose a method available in your region. Review the provider's fee, processing time, and withdrawal hold before confirming.
Add enough for the plan price, exchange spread, and later network or withdrawal fee.
A card or bank deposit can have a temporary withdrawal hold.
Do not open a Yamete invoice until your funds can actually be withdrawn.
Funding and purchase
123
Official interface screenshot — controls may changeAdd cash, then buy
1
Confirm the asset and the amount you are buying.
2
Review which balance or funding method will be charged.
On the exchange, choose Buy or Trade, select the same crypto asset you intend to use on the hosted payment page, enter your budget, and review the final amount and fee.
Asset names can exist on more than one network; the network choice comes during withdrawal.
Keep a small fee buffer instead of buying only the plan's USD value.
Crypto prices and network fees can change before you send.
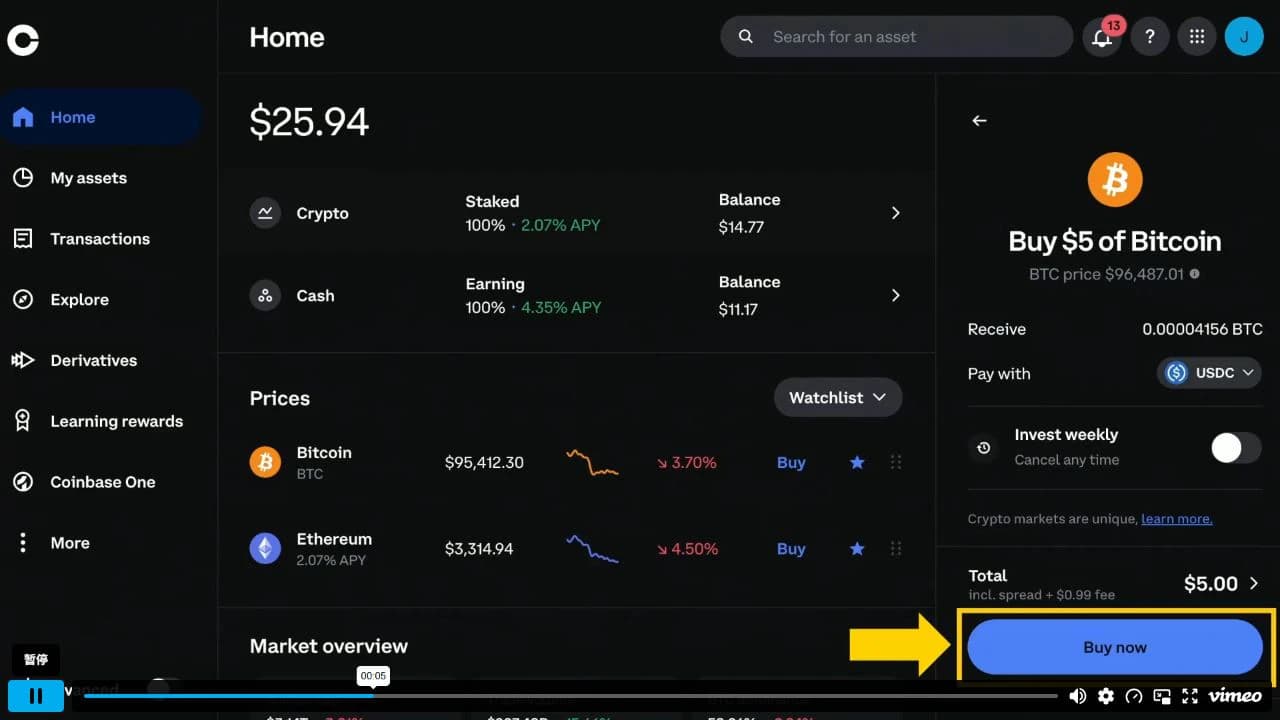
Official Coinbase video
Watch how a crypto purchase is reviewed
This official desktop walkthrough shows where Coinbase presents the asset, funding balance, total, and Buy now action.
The balance, market price, and $5 purchase shown are Coinbase demonstration data. Buy only an asset supported by your current NOWPayments invoice and keep enough for fees.
Choose the exact asset and network on the hosted page
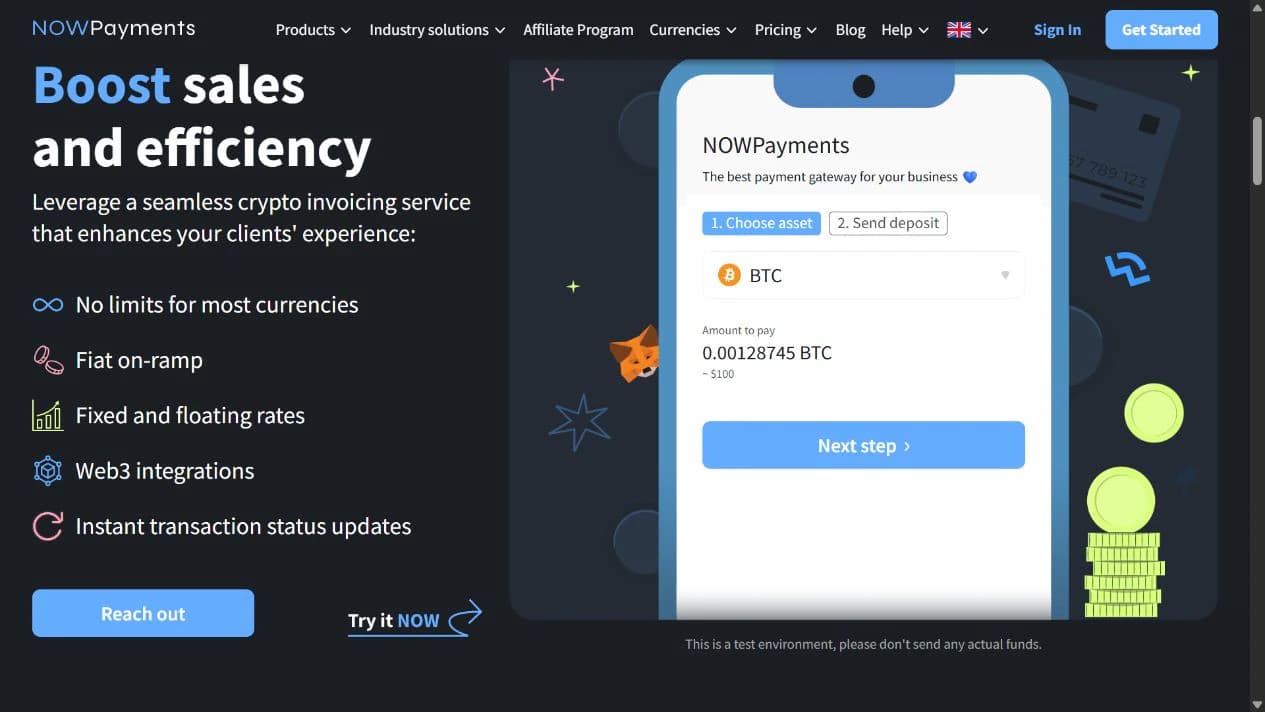
Return to Yamete Pricing, choose Crypto, and open the hosted payment page. Select an asset and network that your exchange can withdraw on. The invoice then shows the exact amount, destination address, any memo or tag, and its payment window.
The asset and network on the exchange must exactly match the invoice.
Copy details from the current invoice; never reuse an address from an older order.
If your exchange does not support the displayed network, go back and select another supported invoice option.
Hosted payment page
123
Official interface screenshot — controls may changeChoose asset and network
1
Choose an asset that your exchange can withdraw.
2
Use the exact crypto amount shown by your live invoice.
3
Continue to reveal the current deposit instructions and payment window.
Open Send or Withdraw on the exchange. Paste the destination, select the exact same network, include the memo or tag when shown, and enter an amount that leaves at least the invoice amount for the recipient after the exchange's withdrawal fee.
Compare the first and last characters after pasting the address.
Read whether the exchange deducts its fee from the send amount or adds it separately.
Review asset, network, memo, recipient amount, and invoice expiry before confirming.
Withdrawal review
12
Official interface screenshot — controls may changeMatch every field
1
Paste only the destination from the current invoice.
2
Use the provider's Send crypto flow, not an internal transfer to another product.
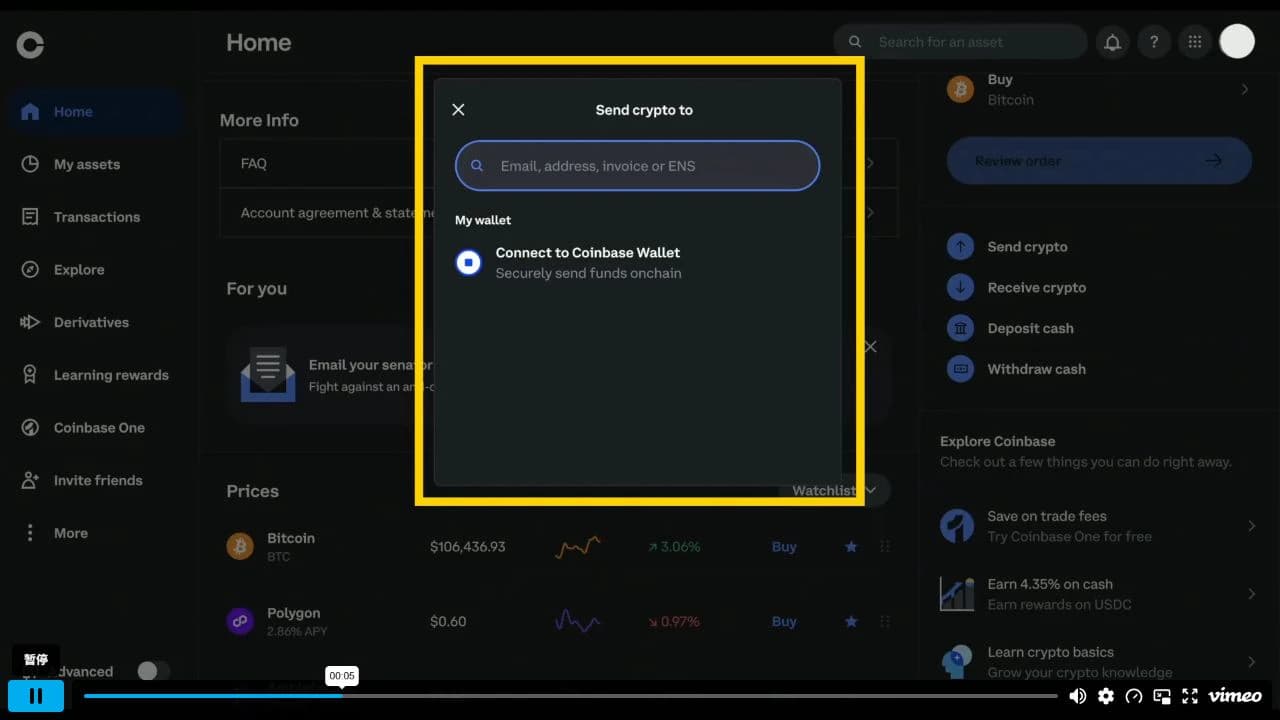
Official Coinbase help video · captured 29 Aug 2026This frame is from Coinbase's official sending video. Paste the current invoice destination here, then match every field on the following review screens.
Official Coinbase video
Watch how an external crypto send starts
This official desktop walkthrough shows the Send crypto entry, recipient field, review flow, and exchange confirmation.
The destination and amount in the video are demonstration data. Copy the destination, asset, network, memo or tag, and exact amount only from your current NOWPayments invoice.
Keep the Yamete order ID and result page. A payment can move through waiting, confirming, and processing before it finishes. Credits or pass time appear only after the provider callback and Yamete's server query agree.
Do not send a second payment just because confirmation takes time.
A partially paid order stays unfulfilled and does not grant Credits.
If the invoice expired before sending, return to Pricing and start a fresh order.
Payment confirmation
123
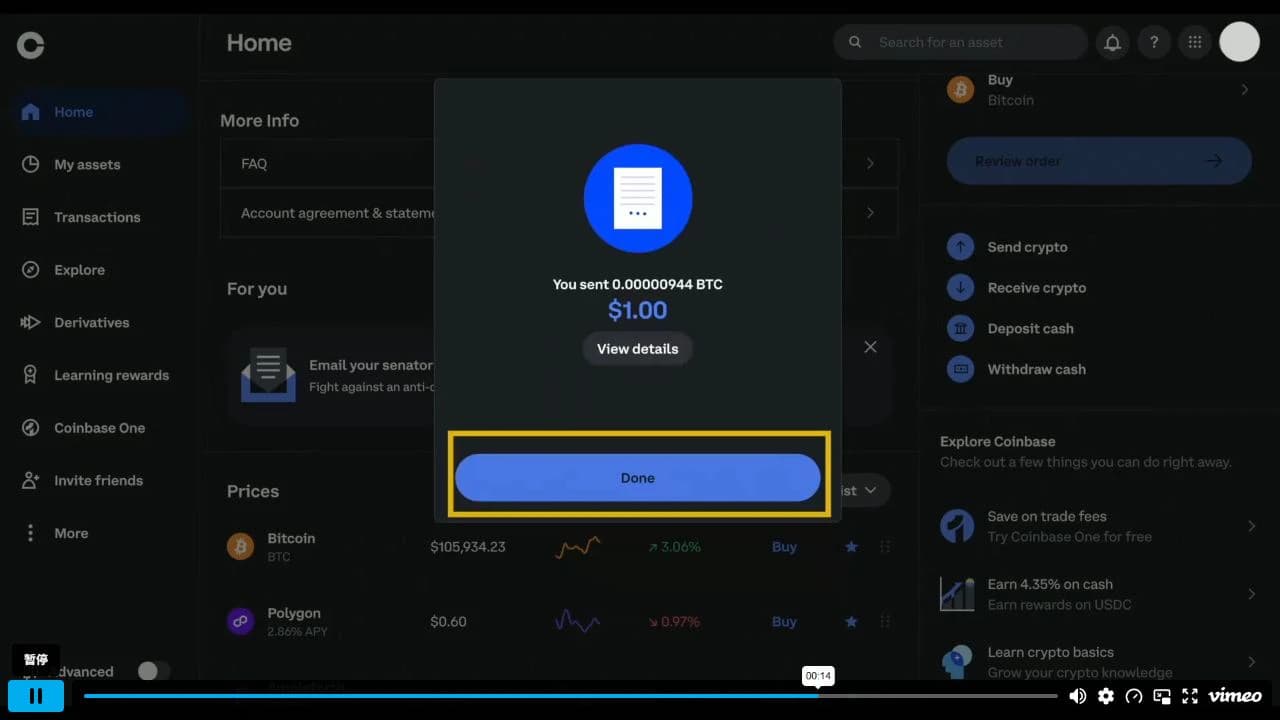
Official interface screenshot — controls may changeWait for completion
1
Check the sent crypto amount before closing the exchange screen.
2
The fiat value here is the exchange's own confirmation, not Yamete settlement.
3
After Done, return to Yamete and wait—do not send a duplicate payment.
Treat the invoice as one exact set of instructions. If one line differs, stop and correct it before sending.
The crypto asset is identical.
The blockchain network is identical.
The destination's first and last characters match after pasting.
The memo or tag is included when the invoice shows one.
The recipient amount covers the invoice after withdrawal fees.
The invoice payment window is still open.
!
If something does not look right
Stop before sending whenever possible. Crypto transfers normally cannot be cancelled after broadcast.
Wrong asset or network
Do not send. Return to the invoice and choose an option that your exchange supports. If already sent, keep the order ID and exchange withdrawal record for support.
Never resend to the old address.
Memo or tag is missing
Some assets require both an address and a memo or destination tag. If the invoice shows one, copy it into the exchange's separate field.
Missing it can prevent automatic matching.
Amount is short
An exchange may subtract its withdrawal fee. A partially paid order does not grant Credits, even if the transfer itself confirms.
Check the recipient amount before sending.
Expired or still confirming
Do not send after expiry and do not duplicate a transfer that is confirming. Start a new checkout only when the old invoice was never paid and has expired.
Keep the order ID and check the result page.
Official help and current status definitions
Provider screens, regional availability, fees, assets, and networks change. Check the official help page for the service you actually use.